Creating a New Web Document in Adobe Illustrator
Creating a New Web Document in Adobe Illustrator,few setting that we need to take note , before starting a new project.
As Adobe Illustrator is an independent resolution Art Works, it will be difficult for us to change some setting. If we mess up at the beginning stage.I have done this regarding for creating new documents , in my previous blog you can check out here.
Set Up a New Web Document from Scratch
Follow the Setup below step by step to create a New web Document from scratch.
Step 1:
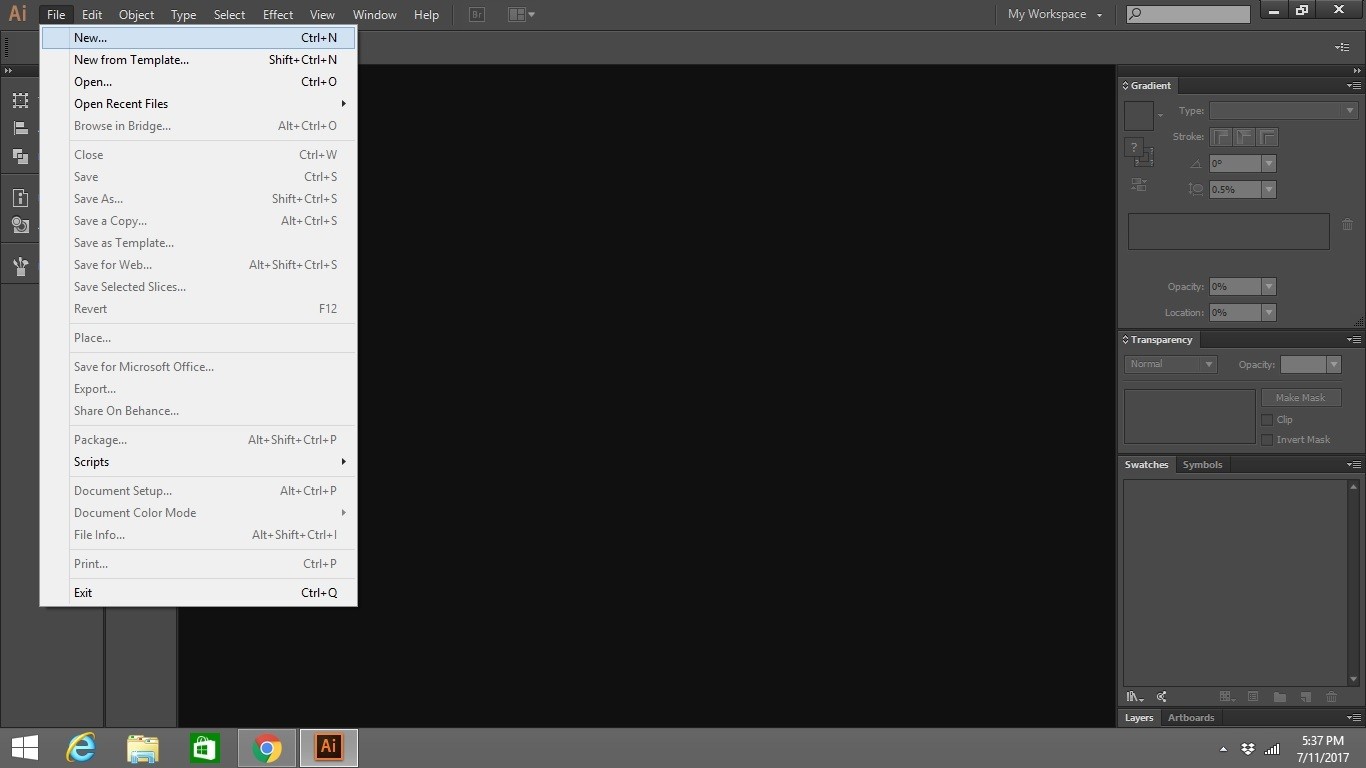
Open Adobe Illustrator,Navigate to File,and click new .

Step 2: Setting Up Parameter
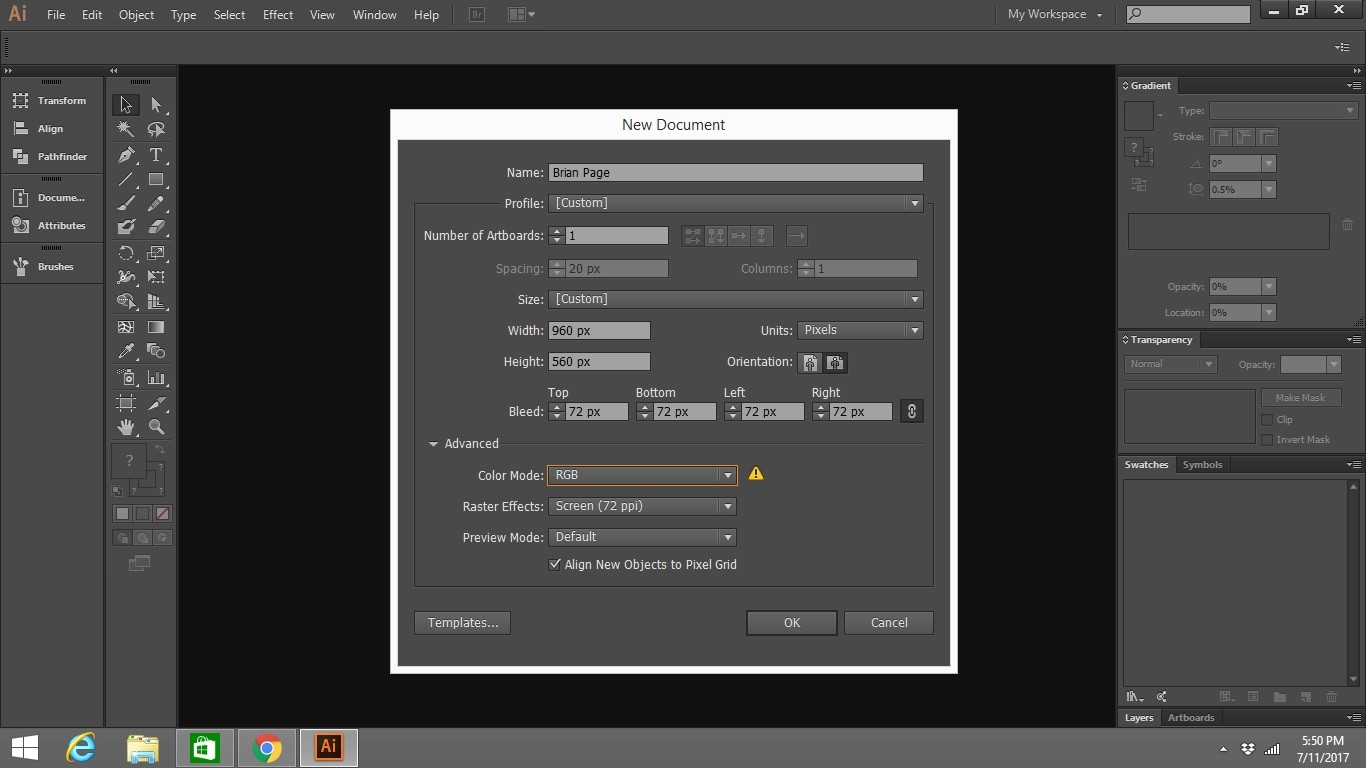
- Provide a file name for your new document.
- At Profile select ” Custom Profile”
- Select the numbers of art board that you need for your project
- Select the Web Page Size of your Project.
- When you select the web page Size it will automatically assign the Width and Height, change it
- If you have a custom Web Page size you can modified the Project Width and Height
- Choose the SI Unit Pixel
- Color Mode = RGB( Red / Green / Blue)
- Raster Effects= Screen 72 ppi
- Checked the check box ” Align New Object to Pixel Grid “
- Click Ok

To get your Ruler visible in your art Board
Press CTRL+R on Windows or CMD+R on Mac.

Controlling Multiple Documents
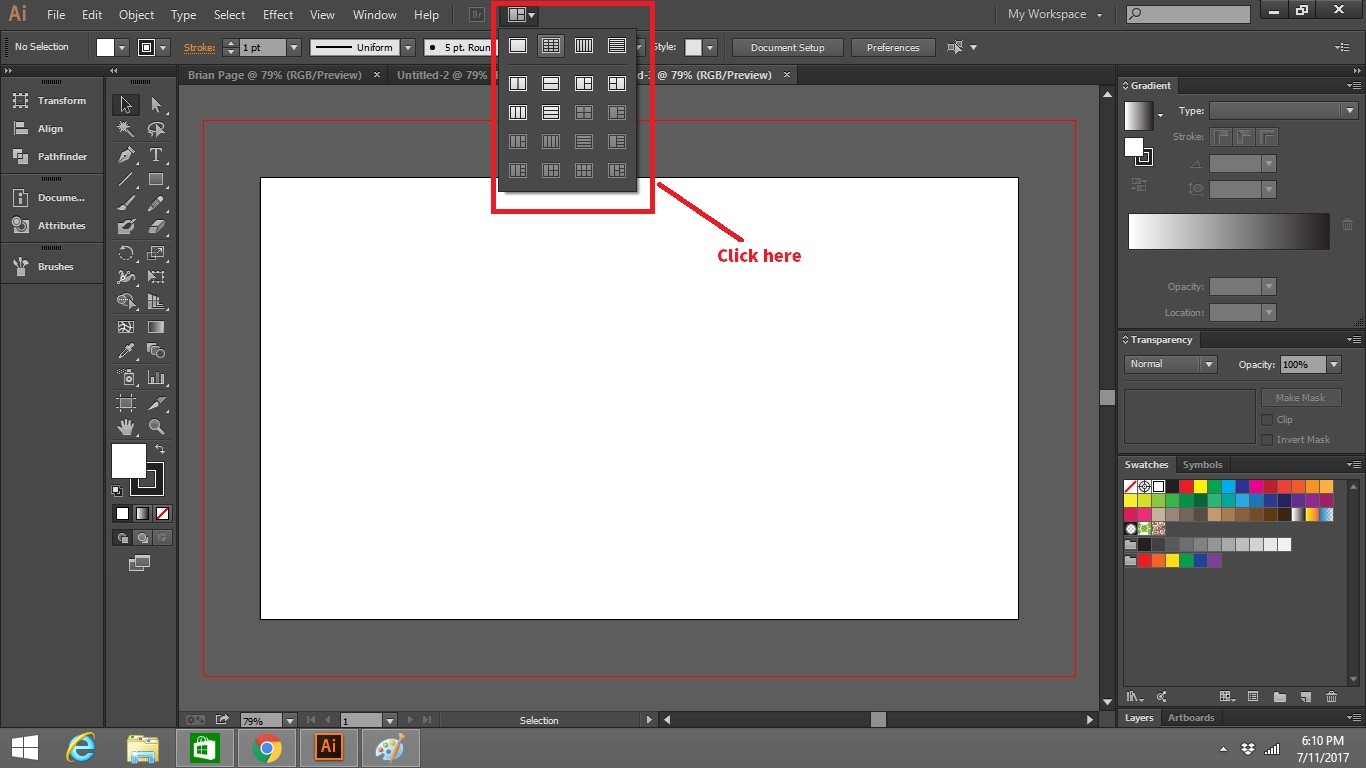
Imagine if you are working with multiple projects at a time,you would definitely want to be in control of the view of various project a once.Views of the Projects can be rotated by selecting different angles as shown on the picture below. You can toggle different view accordingly to your work needs.

Check out Adobe Illustrators site to learn more.
