
How to Setup WordPress Theme Development Environment
In this Blog Post , i will show you the steps of setting up a WordPress Theme Development Environment on your Computer.
This post is for WordPress Theme Developer , Web Developer , Webmaster etc.
Step 1
You will need a local server with WordPress installed on your Computer
Check out Here
Step 2
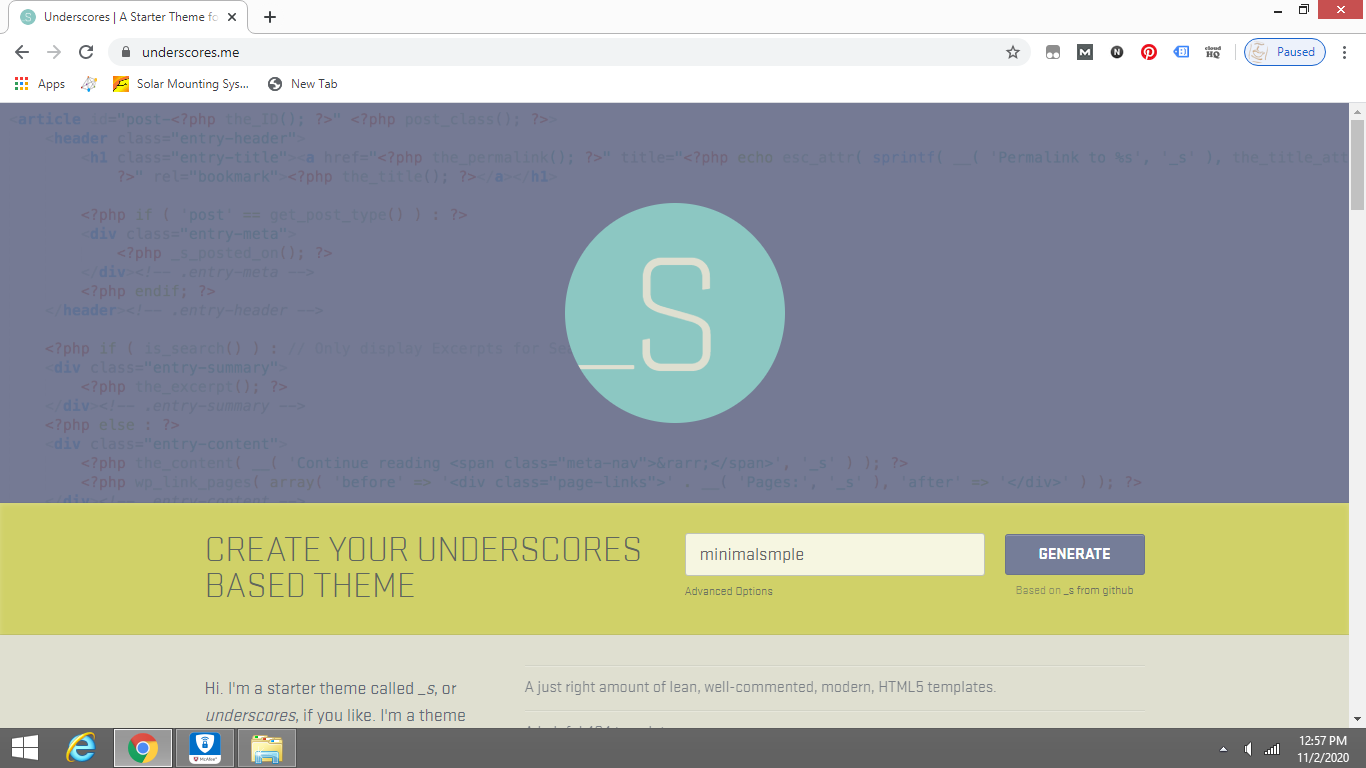
Download a WordPress Starter Theme Online
You can check out a list of Starter Theme Here
Some Prerequisite before Starting to develop WordPress Theme , you will need to know some HTML / PHP / CSS / Javascript / Jquery / etc.
Finally a lot of sweat and Perseverance just don’t give up 🙂
In this Example i will use UnderScore
Step 3
Download and Unzipped the Starter theme
Download Here
Step 4
Check out and understands whats inside your Starter Theme
Before developing WordPress Theme , you should have a clear understanding on WordPress Template Hierarchy .
(1) How to Link Resources
(2) How to Enque Resources
(3) What are the function of the different Individual PHP files
(4) WordPress Developed PHP Functions
(5) How and where to Modify the code
You can study the WordPress Template Hierarchy over here
Step 5
Move the Starter Theme folder into your root Folder
root:\………\wordpress\wp-content\themes\Your Starter Theme Folder
Step 6
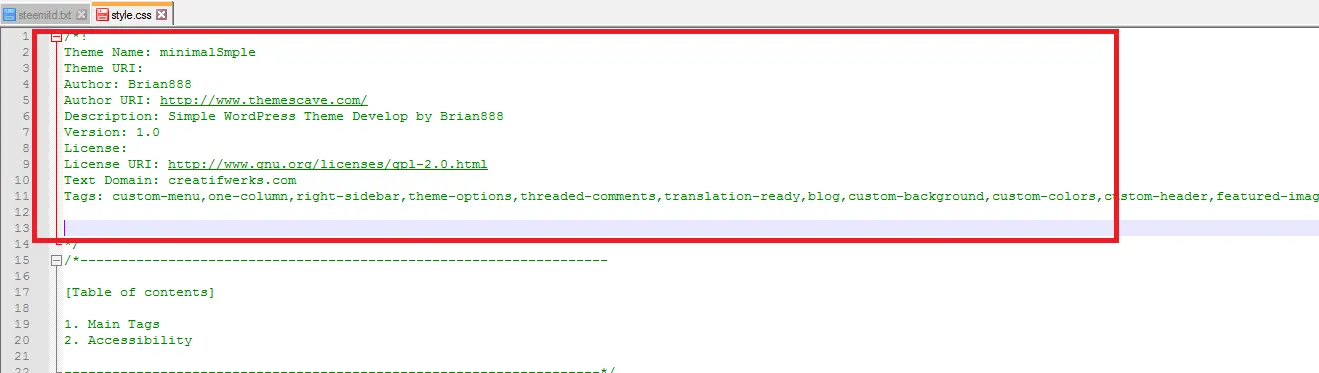
Navigate to your Theme Folder and edit style.css
root:\………\wordpress\wp-content\themes\Your Starter Theme Folder\style.css
Introduce your Theme by inputting
(1) Theme Name
(2) Author
(3) Version
(4) License / Tags / etc
Step 7
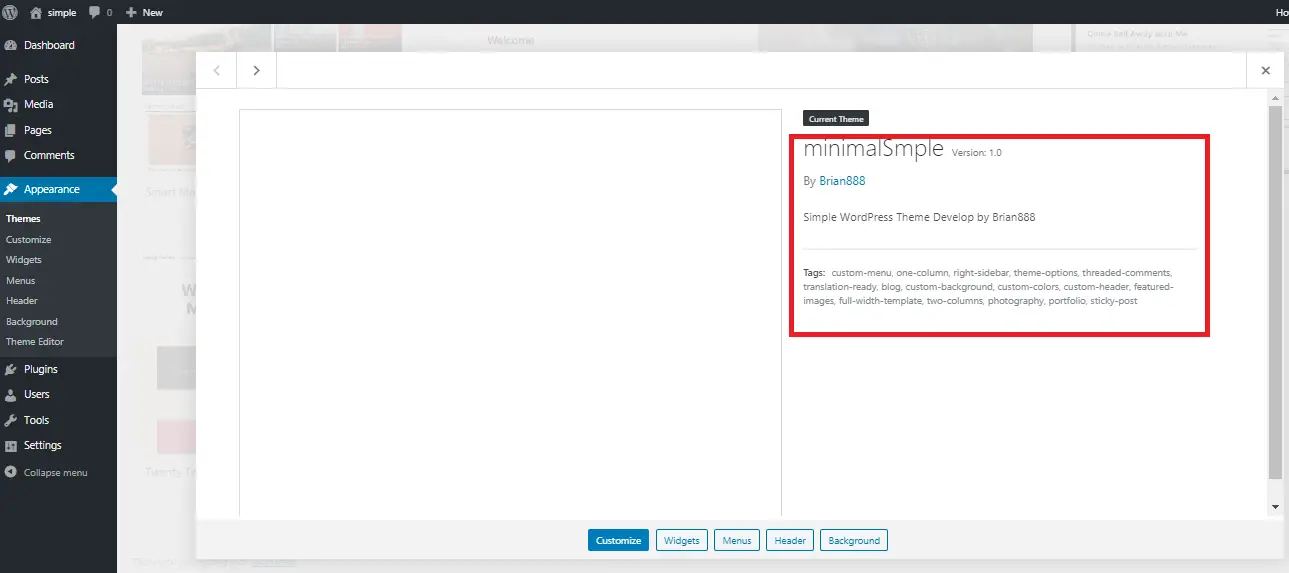
Check out your Theme
(1) Start Up your Local Server
(2) Enter WordPress Login Credential to enter word press Dash Board
(3) Goto Appearance -> Theme -> Activate your Theme
(4) Click Theme Details
(5) You will see the Theme Details you alter in the style.css file
Step 8
Create a Theme Thumbnail for your WordPress Theme
(1) Navigate to your theme root folder
root:\………\wordpress\wp-content\themes\Your Starter Theme Folder
(2) Replace screenshot.png with your Theme Thumbnail. the file name should be the same